
Guide » Sanding plaster
Sanding plaster - That's how it's done!
Difficulty: Easy | Costs: approx. 50 euros/20m² | Workload: approx. 8h/20m²
Sanding plaster is an important step in wall and ceiling renovation. It ensures a smooth and even surface that is optimally prepared for painting or wallpapering. In this article you will learn everything about sanding plaster, the right grit and the best tools for it.
Table of contents
- 1. Sanding plaster: why and when?
- 2. Types of plaster and their differences
- 3. Tools for grinding plaster
- 4. Sanding plaster Grit: The right choice
- 5. Sand smooth plaster: step-by-step instructions
- 6. Sand plaster smooth: tips for a perfect result
- 7. Sanding plaster by hand: advantages and disadvantages
- 8. Conclusion
- 9. Frequently Asked Questions
1. Sanding plaster: why and when?
Sanding plaster is necessary to smooth out imperfections, cracks or repairs and create a uniform surface. It is often used when renovating old buildings or after plastering walls and ceilings. Sanding plaster is especially important if you want to achieve a smooth and clean surface for painting or wallpapering.
2. Types of plaster and their differences
2.1 Lime-cement plaster
Lime-cement plaster is a mixture of lime and cement and is excellent for indoor and outdoor use. It is breathable and moisture-regulating. Lime-cement plaster can be sanded, but you should be careful and choose the right grit.
2.2 gypsum plaster
Gypsum plaster is a smooth type of plaster that is easy to work with. It is particularly suitable for indoor use and provides an excellent surface for painting or wallpapering. Gypsum plaster is easy to sand and smooth.
2.3 Clay plaster
Clay plaster is an ecological plaster made of clay and sand. It ensures a pleasant indoor climate and is particularly suitable for indoor use. Clay plaster can also be sanded, but the process is a little more complex than with other types of plaster.
3. Tools for grinding plaster
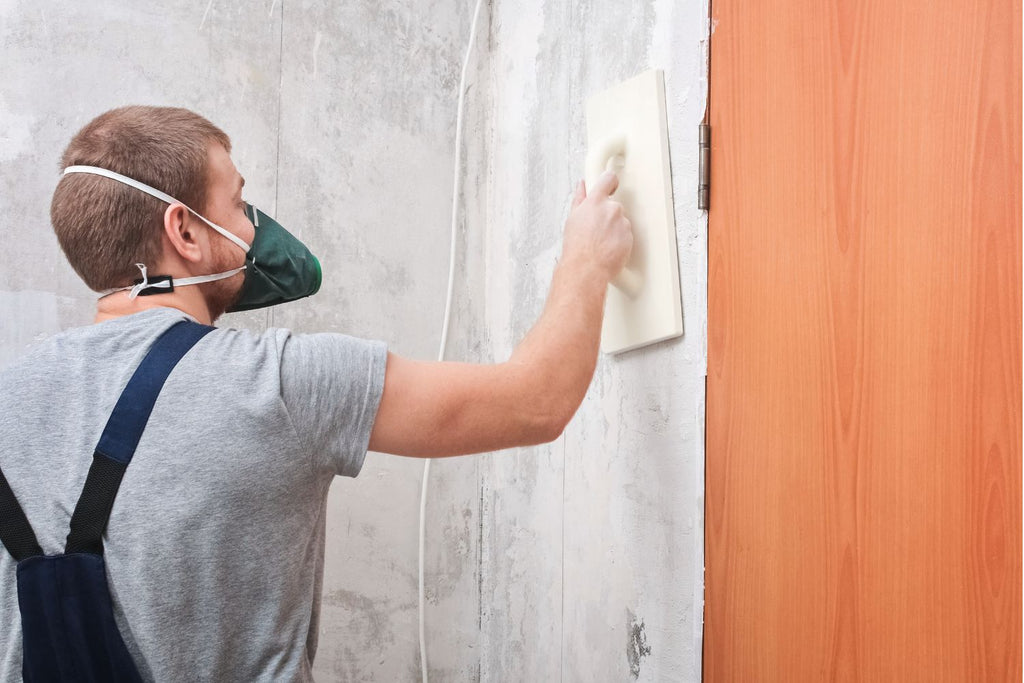
3.1 Hand grinder
A hand sander is a simple tool that's great for smaller areas or touch-up jobs. Advantages are the high level of control, flexibility and independence from power sources. Disadvantages are the more time and physical exertion compared to electrical devices.
3.2 Eccentric sander
The eccentric sander is an electrical device that is particularly well suited for sanding plaster due to its circular movement. It enables quick and even sanding of large areas and offers a good result. When using a random orbital sander, care should be taken to use the right attachment and the right grit.
3.3 angle grinder
An angle grinder is a powerful tool that is primarily used for grinding concrete, stone and metal. If necessary, you can also grind plaster with it. Since angle grinders are very powerful, you should be particularly careful when grinding plaster and make sure you choose the right grit. For optimal removal of dust, use a suction hood that was specially developed for the angle grinder.
4. Sanding plaster Grit: The right choice
4.1 grit for coarse plaster
A coarser grit should be chosen for sanding rough plaster, for example 40 or 60. A larger grit removes material quickly and evens out rough unevenness. In the case of severe unevenness, it can make sense to change from a coarser to a finer grit in several steps.
4.2 grit for fine plaster
Fine plaster requires a finer grit, for example 120 or 180. A finer grit gives a smooth surface and can remove small imperfections and scratches. With very fine types of plaster, such as gypsum plaster, you should be particularly careful and possibly carry out several sanding operations with different grits.
4.3 Sanding plaster grit: overview
This table gives an overview of the recommended grits for different types of plaster when sanding. Note that the specifications may vary depending on the individual project and the desired result. It's a good idea to test on an inconspicuous area for best results:
|
cleaning type |
Recommended grit |
Remarks |
|
Coarse plaster |
40 or 60 |
Fast removal of material and leveling out rough unevenness. |
|
fine plaster |
120 or 180 |
For smooth surfaces and removing small bumps and scratches. |
|
gypsum plaster |
180 to 240 |
Very fine plaster, requires careful sanding and possibly several sanding passes. |
|
Lime-cement plaster |
60 to 120 |
Be sure to use the right grit and be careful to avoid damage. |
|
Decorative plaster (e.g. rough plaster) |
80 to 180 |
Depending on the desired surface structure, a coarser or finer grain can be used. |
5. Sand smooth plaster: step-by-step instructions
- Choose the right grinder and the right grit for the plaster to be processed.
- Protect the floor and surrounding furniture from dust by laying out plastic sheeting and covering furniture.
- Wear safety equipment such as safety goggles, respirator, and work gloves.
- Start sanding the wall or ceiling in smooth, circular motions. Be careful not to apply too much pressure to avoid damaging it.
- Remove the resulting dust regularly with a vacuum cleaner or a soft brush.
- Check the surface and repeat the sanding process with a finer grit if necessary to achieve a smooth and even result.
- Thoroughly clean the sanded surface of dust and dirt before proceeding.

6. Sand plaster smooth: tips for a perfect result
- Always work in well-ventilated rooms to keep dust exposure to a minimum.
- Use high quality abrasives to get the best results and increase the life of the grinder.
- Before sanding the entire surface, practice on an inconspicuous area to get a feel for the tool and grit.
7. Sanding plaster by hand: advantages and disadvantages
Hand sanding plaster has some advantages, such as greater control over the sanding process and the ability to target small areas. However, hand sanding is also more time-consuming and physically demanding than using an electric sander.
8. Conclusion
Sanding plaster is an important step in preparing walls and ceilings for painting or wallpapering. Choosing the right tool and the right grit are crucial for an optimal result. With practice and patience, you can achieve a smooth and even surface that will give your rooms a professional look.
9. Frequently Asked Questions
- Can lime-cement plaster be sanded? Yes, lime-cement plaster can be sanded. Pay attention to the right grit and proceed carefully.
- Can you sand plaster with an eccentric sander? Yes, a random orbital sander works well for sanding plaster. Choose the right attachment and the right grit for an optimal result.
- Which grit to grind for plaster? Choosing the right grit depends on the type of plaster and the desired result. A grit of 40 or 60 is suitable for coarse plaster, and a grit of 120 or 180 for fine plaster.
- Can plaster be sanded smooth? Yes, a smooth and even surface can be achieved by sanding plaster. Choose the right grit and proceed in several steps.
- What grit to sand plaster? The grit for sanding plaster depends on the type of plaster and the desired result. Coarse grain sizes are suitable for coarse plaster, finer grain sizes for fine plaster.